

 English
 عربى

Content
- 1 The Inside-Out Method, Step by Step
- 2 Why the Inside-Out Method Beats Stuffing
- 3 Match the Method to Your Closure and Tie System
- 4 Duvet Sizes and Fit: What the Numbers Really Mean
- 5 Building the Bed Layer by Layer
- 6 Keeping the Layers Fresh Between Washes
- 7 Eight Mistakes That Add Ten Minutes to the Job
- 8 One Person, Small Room, Heavy Insert: Workarounds That Hold Up
- 9 Frequently Asked Questions
- 9.1 Can one person put a duvet cover on alone?
- 9.2 Do duvet covers really need corner ties?
- 9.3 How often should a duvet cover be washed?
- 9.4 Why does my duvet bunch up inside the cover?
- 9.5 What is the difference between a duvet cover and a comforter?
- 9.6 Can you put a duvet cover on a comforter?
- 9.7 Does the inside-out method work with a zippered cover?
- 9.8 How long should the whole job take?
You are standing at the foot of the bed holding a duvet cover that looks like a collapsed parachute, and the insert has already slid onto the floor twice. The short answer comes first: turn the cover inside out, push both arms into the two far corners from the inside, pinch the matching duvet corners through the fabric, knot the corner ties, and shake the whole bundle down through the opening. A queen-size duvet goes on in about 90 seconds this way, and you never have to climb inside the fabric or wrestle the insert like a sleeping bag.
The rest of this guide explains why that order of movements works, what to check before you start, how zippers, snaps and flap closures change the routine, what the size numbers on a duvet package actually mean, and where the duvet sits in the wider bedding stack. It also covers the mistakes that turn a 90-second job into a ten-minute one, plus the questions people ask most often while standing over an unmade bed.
The Inside-Out Method, Step by Step
This sequence works on nearly every duvet cover sold today, whether the closure is a row of buttons, a hidden zipper or an overlapping envelope flap. It also works with four corner ties, eight-point loops, or no hardware at all.
- Lay the cover flat on the bed with the wrong side facing out. Smooth the seams so the two top corners are easy to find, and keep the closure at the bottom edge nearest your feet.
- Push both arms into the cover all the way to the top corners, the same way you would put on a jacket backwards.
- Pinch the top-left corner of the duvet through the fabric with your left hand and the top-right corner with your right. If the cover has ties or loops, knot the duvet corner to the cover corner now, while your hands are already in position.
- Lift the whole bundle, cover and insert together, and shake it hard two or three times. Gravity pulls the duvet down and the cover follows it.
- Release the corners and pull the cover down over the insert, working from the top corners toward the opening, one side at a time.
- Close the buttons or the zipper, shake once more, and let the duvet rest for a minute before smoothing it across the bed.
The sequence is short because you handle each corner exactly once. The ties are the difference between a clean result and a mess. If they are not knotted before the shake, the insert corners pull free often enough that you end up reaching through the opening to hunt for them, and that is where most of the ten-minute versions of this job go wrong.
When the Insert Is Heavy or Slightly Oversized
A king-size down-alternative insert commonly weighs 3 to 4 kg, which is enough to drag the cover off the bed mid-shake. Work on the mattress rather than the floor, keep your feet apart for balance, and shake along the length of the bed instead of lifting the bundle into the air. If a second person is available, they should hold the two bottom corners of the cover while you shake from the top; that single change cuts the effort by more than half.
Why the Inside-Out Method Beats Stuffing
Three methods circulate widely, and they are not equally good. The table below compares them on the things that matter when you are standing over an unmade bed at the end of a long day.
| Method | Typical Time | People Needed | Best For | Main Risk |
|---|---|---|---|---|
| Inside-out shake | 60 to 120 seconds | One or two | Covers with ties, loops or clips | Untied corners slip free during the shake |
| Roll or burrito method | 3 to 5 minutes | One | Heavy inserts and covers without ties | Loose rolling traps air and creases the fabric |
| Stuff and shake | 5 to 10 minutes or more | Two | Last resort when the cover fits tightly | Insert bunches in the middle and never squares up |
The inside-out method wins on one mechanical detail: the cover and the insert travel in the same direction at the same time, so the fabric never has to be forced past a stationary mass of filling. Stuffing works against friction instead. Your hand pushes the cover ahead of it, air gets trapped between the layers, and the insert bunches in the middle where you cannot reach it. The roll method avoids that problem, but it needs flat floor space and takes three to five times as long because every wrinkle has to be smoothed out again after unrolling.
Fabric changes the difficulty more than most people expect. A 200-thread-count cotton percale has a dry, slightly grippy surface, which helps corners hold through a shake. Sateen and brushed microfiber slide easily, which feels luxurious on the bed and frustrating during assembly, so ties matter far more on those covers. Linen sits in the middle and shows the fewest wrinkles.
Match the Method to Your Closure and Tie System
The closure and the attachment hardware decide how you handle the last 20 seconds of the job, and they also decide how well the duvet stays squared up after a night of sleep.
| Attachment Type | What You Will See | How It Changes the Routine |
|---|---|---|
| Fabric ties and corner loops | Short ribbons inside each corner, matching loops on the insert | Knot them while the cover is still inside out, before the shake |
| Snap tabs or buttons | Plastic snaps or small buttons on short tabs | Connect them after the shake, then push the tabs back inside |
| Hidden zipper | A zipper running along the bottom seam | Leave it fully open during the shake, then close and tuck the pull inside |
| Envelope flap | Overlapping fabric at the opening, no hardware | Fold the flap over last; corners drift the most on this style |
| Eight-point loops | Four corner loops plus four mid-edge loops | Tying all eight gives the squarest look; four is usually enough |
If the cover has no ties at all, add them. Clip-on corner straps or a few hand-tied ribbon loops solve the problem permanently, and they cost less than replacing a cover that never sits straight. On zippered covers, the zipper is an advantage rather than a chore: an open zipper gives the insert room to drop into place, while a closed one traps a cushion of air that keeps the duvet riding high inside the fabric.
Duvet Sizes and Fit: What the Numbers Really Mean
Most duvet complaints are sizing complaints in disguise. A cover that is 4 inches wider than the insert will always look half empty, no matter how carefully you shake it into place.
| Size Name | Typical Insert | Typical Cover | What to Watch |
|---|---|---|---|
| US Twin | 68 x 88 in | 68 x 88 in | Twin XL inserts run 2 inches longer |
| US Full or Queen | 86 x 86 to 88 x 92 in | Same range | The widest variation of any size; always measure both pieces |
| US King | 104 x 92 to 106 x 92 in | Same range | A king insert in a queen cover never squares up |
| US California King | 102 x 96 in | Same range | Longer and narrower than a standard king |
| European Single | 135 x 200 cm | 135 x 200 cm | Often sold as a child or guest size |
| European Double | 200 x 200 cm | 200 x 200 cm | Square format; a rectangular cover will not drape evenly |
| European King | 240 x 220 cm | 240 x 220 cm | Check whether the cover is 220 cm or 240 cm wide |
Two rules cover almost every case. First, the cover should match the insert or be no more than 2 inches larger on each side; anything beyond that and the duvet slides around inside the fabric all night. Second, measure the insert rather than trusting the package label, because the same nominal size can differ by 2 to 3 inches between suppliers. A cover bought for one brand's "Full/Queen" duvet may hang loose on another's insert of the same name.
European sizing follows the same logic in centimetres, and the most common mistake is buying a 200 x 200 cm cover for a 135 x 200 cm insert because both are described as a double somewhere in the listing. The cover will technically fit, but the duvet will shift to one side within a night.
Building the Bed Layer by Layer
A duvet cover is the top layer of a stack, and how the layers beneath it are arranged changes how the duvet sits and how often the bed has to be rebuilt from scratch.
- Mattress protector: waterproof and fitted, sitting directly on the mattress.
- Mattress topper: a memory foam layer adds pressure relief, and it needs its own cover or a fitted sheet over it so the foam does not grip the duvet.
- Fitted sheet: pulled tight on all four sides over the topper.
- Flat sheet: optional, and often skipped when the duvet cover itself is washed regularly.
- Duvet in its cover: the layer you fold back at night and straighten in the morning.
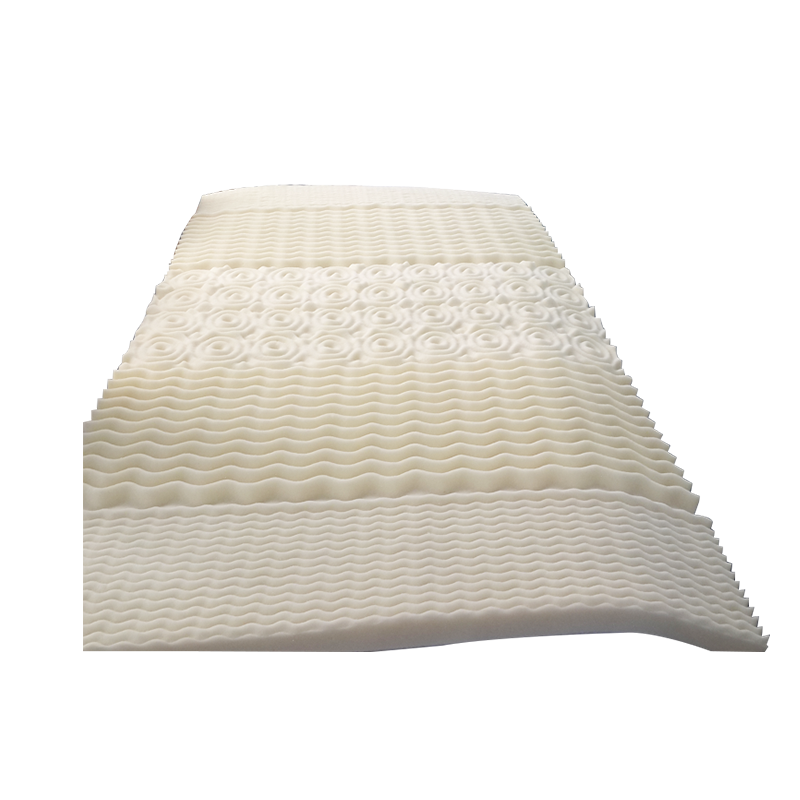 5 Zone memory foam mattress topperThe unique five-zone design provides different support for different parts of the human body, from the head, shoulders to the hips and legs, to fully relieve pressure ...View Product →
The practical detail is where the duvet ends. Tucking a heavy duvet under the mattress compresses a soft topper and leaves a visible ridge along both sides, while letting the duvet hang free keeps the foam at its original height. A zone-built topper, with firmer foam under the hips and softer foam under the shoulders, holds that shape far better under nightly load than a single-density slab, and a removable cover makes the layer underneath the duvet much easier to keep clean.
If the duvet cover and the topper cover are both slippery synthetics, add a flat sheet between them. That single layer stops the duvet sliding off the bed overnight, and it also reduces the amount of cover washing needed, because the sheet absorbs most of the friction and skin contact.
Keeping the Layers Fresh Between Washes
The cover takes the wear, so it should be washed far more often than the insert inside it. A workable rhythm is every one to two weeks for the cover, with a cool or warm wash and a low tumble dry. The insert itself usually needs cleaning once or twice a year at most, and often only spot cleaning at the corners and along the top edge where skin contact is heaviest.
Memory foam needs a different approach again. A memory foam pillow or topper should never go into a washing machine, because saturation breaks down the cell structure and the core can take two or three days to dry. Surface cleaning with a mild detergent and a damp cloth, followed by air drying away from direct sun, keeps the material intact for years. If you want the full routine, the guide on how to clean memory foam pillows without soaking the core walks through it step by step.
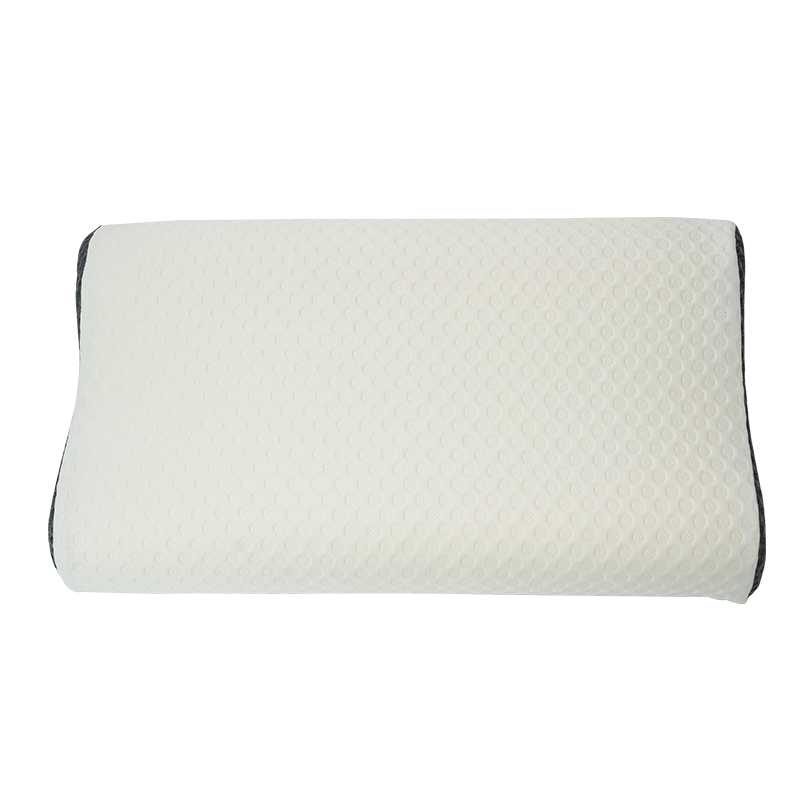 Memory foam contour pillowOur memory foam uses high-density, low-rebound technology, which can automatically adjust the support strength according to the weight and body temperature of the head...View Product →
When a pillow has flattened past the point where cleaning helps, replacement is the cheaper answer. A contour pillow with a supportive neck roll holds its shape through the night, fits a standard pillowcase, and pairs with the duvet to keep the head, neck and shoulders on the same level instead of stacking two flat pillows into a ramp.
Eight Mistakes That Add Ten Minutes to the Job
- Shaking before the ties are knotted. The corners separate in the first second and you spend the next five minutes fishing for them.
- Working on the floor. The bed is at the right height, and gravity does part of the work for you.
- Leaving the zipper closed during the shake. Trapped air keeps the insert riding high and the cover refuses to drop.
- Using a cover a size or two larger than the insert. No amount of shaking fixes a 4 inch gap.
- Holding one corner while reaching for the other. The first corner always escapes; guard it with your forearm instead.
- Shaking sideways across the bed. Shake along the length of the bed so the insert travels in a straight line.
- Smoothing the cover immediately. Give the filling a minute to settle, then smooth; otherwise the cover creases along the seams.
- Vacuum-bagging the insert between seasons. Long-term compression flattens the loft, and the duvet never looks full again.
One Person, Small Room, Heavy Insert: Workarounds That Hold Up
The inside-out method is a one-person technique by design, but a few adjustments make it easier in tight spaces and with heavy winter fills.
- Clip the bottom corners of the cover to the duvet corners with laundry clips before the shake. This keeps the bundle together if your grip slips.
- Work with the head of the bed against a wall. The wall stops the bundle sliding away on a smooth mattress.
- In a small room, shake on the diagonal of the bed rather than trying to swing the duvet in open air.
- For inserts over 4 kg, consider a lighter summer fill and keep the heavy one for cold months. Swapping a fill takes less effort than fighting the same heavy duvet twice a week.
- Fold the finished duvet in thirds rather than in half when storing it on the bed. The crease lines fall where the cover folds back at night, so the fabric looks smoother in the morning.
Frequently Asked Questions
Can one person put a duvet cover on alone?
Yes. The inside-out method is built for one person, because the cover corners hold the insert corners while you shake. Ties or clips replace the second pair of hands that the stuffing method demands.
Do duvet covers really need corner ties?
Not strictly, but covers without ties let the insert drift toward the foot of the bed within a few nights. That means re-shaking and re-squaring the bed far more often than most people want to.
How often should a duvet cover be washed?
Every one to two weeks if you sleep directly under it without a top sheet, and every two to three weeks if a flat sheet sits between you and the duvet. Wash sooner after illness, night sweats or pets sleeping on the bed.
Why does my duvet bunch up inside the cover?
Three causes cover most cases: the cover is more than 2 inches larger than the insert, the corner ties are missing or untied, or the insert was never squared up during fitting. Fixing the size mismatch usually solves it outright.
What is the difference between a duvet cover and a comforter?
A duvet cover is a removable, washable shell that goes over a separate insert. A comforter is a finished quilted blanket washed and used as one piece. Covers are easier to launder frequently; comforters need less assembly but are harder to clean.
Can you put a duvet cover on a comforter?
Yes, provided the dimensions match within about 2 inches. Comforters rarely have corner loops, so clips or hand-tied ribbons are worth adding before the first shake.
Does the inside-out method work with a zippered cover?
It works better, as long as you leave the zipper fully open during the shake and close it afterwards. An open zipper lets the insert drop into place instead of riding on a pocket of trapped air.
How long should the whole job take?
Sixty to 120 seconds for a correctly sized cover with ties, three to five minutes with the roll method, and considerably longer whenever the insert is oversized or the corners are left untied.
Put the cover on inside out, knot the corners, shake along the length of the bed, and the whole job takes less than two minutes. Everything else in this guide exists to protect that two-minute result: a cover that matches the insert within 2 inches, ties that hold through the night, and a layer beneath the duvet that stays where it belongs instead of compressing into a ridge.
The details in this guide come from day-to-day work with bedding layers, and the team behind these notes is a memory foam bedding manufacturer that produces the pillows, toppers and cushions that sit under a duvet every night. Get the stack right, and keeping the bed made stops being a chore.