English
 عربى
عربى
Content
- 1 How to Build a Pillow Fort: The Quick Answer
- 2 What You Need Before You Start Building
- 3 Step-by-Step Instructions for Building a Pillow Fort
- 4 Why the Right Pillow Changes Everything Inside a Fort
- 5 Common Pillow Fort Designs and Which Situations They Suit
- 6 Troubleshooting: Why Forts Collapse and How to Fix It
- 7 How to Make a Pillow Fort Actually Comfortable for Adults
- 8 Building a Fort With Kids: Practical Adaptations
- 9 Advanced Fort Building: Techniques That Make a Real Difference
- 10 Frequently Asked Questions About Building Pillow Forts
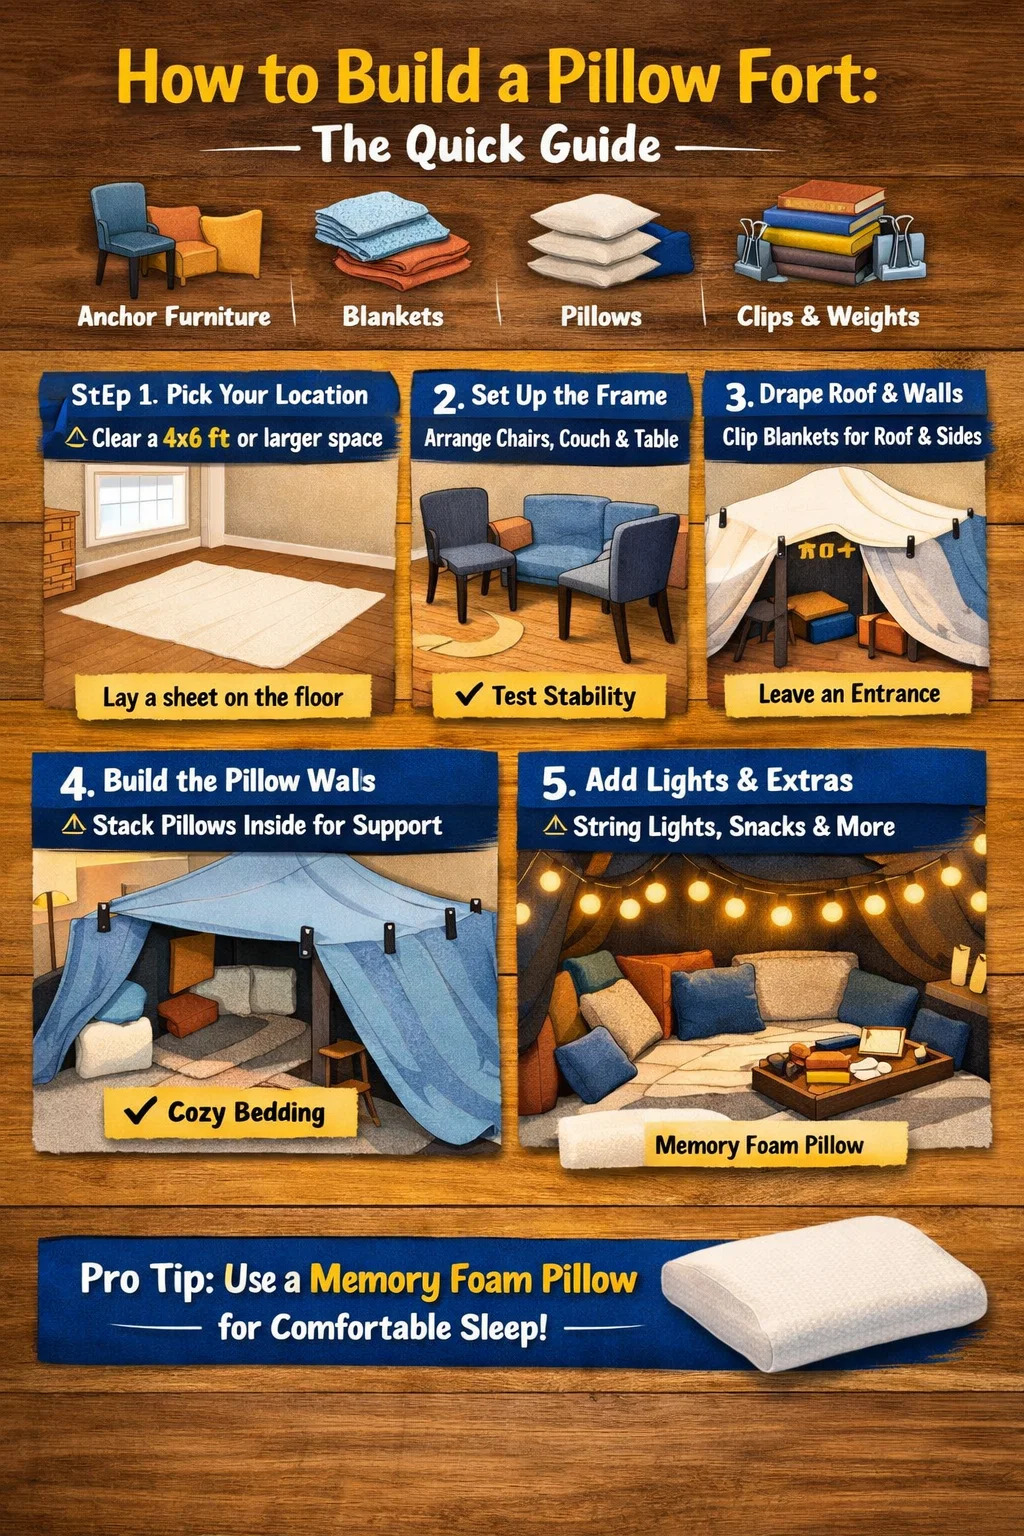
How to Build a Pillow Fort: The Quick Answer
Building a pillow fort comes down to four core steps: choose a strong base structure (like a couch or chairs), drape blankets over the top to form walls and a roof, stack pillows along the edges and interior for support and insulation, then secure everything with clips or heavy objects. A well-built fort can hold its shape for hours — and with the right pillows inside, it becomes genuinely comfortable rather than just a childhood novelty.
The biggest mistake most people make is skipping the foundation. Without a solid anchor point, the whole structure collapses the moment someone leans on a wall. Get the base right, and everything else follows naturally.
What You Need Before You Start Building
Gathering the right materials before you begin saves you from stopping mid-construction to hunt for supplies. Here is a practical checklist of everything worth having on hand:
- Anchor furniture: Two or more chairs, a sofa, a bed frame, or a combination. The sturdier, the better.
- Blankets and sheets: Flat sheets work better than fitted ones for draping. Aim for at least three large blankets — one for the roof, one or two for the walls.
- Pillows in quantity: You need far more pillows than you think. A realistic fort uses between 8 and 20 pillows depending on size.
- Binder clips or clothespins: These hold blankets to furniture edges without damaging fabric.
- Heavy books or cushions: Used to anchor blanket edges on flat surfaces like tables or the floor.
- A flashlight or string lights: Battery-operated LED string lights are ideal — no fire risk, low heat output.
- Optional extras: A mattress topper, sleeping bag, or foam pad for the floor; a tray for snacks; a small bluetooth speaker.
One underrated item on that list: a genuine memory foam pillow. Standard decorative throw pillows are fine for wall building, but if you plan to spend real time inside the fort — reading, watching a movie, or actually sleeping — a memory foam pillow makes the difference between a stiff neck the next morning and actually waking up rested. More on that below.
Step-by-Step Instructions for Building a Pillow Fort
Step 1: Pick Your Location and Measure the Space
The living room floor next to a couch is the classic choice for a reason — you have a ready-made wall on one side, a wide open floor space, and usually a coffee table nearby for additional support. Before moving any furniture, mentally map out how much floor space you want inside the fort. A comfortable single-person fort needs roughly 4 feet by 6 feet of floor space. For two people, aim for at least 5 feet by 8 feet.
Clear the floor completely. Remove small objects, charging cables, and anything that creates a tripping hazard when the interior is dim. Lay down a flat sheet or blanket on the floor first — this creates a clean, defined boundary and feels noticeably warmer than bare carpet or hardwood.
Step 2: Set Up the Frame Structure
Position your anchor furniture around the perimeter of your chosen floor space. Two dining chairs facing each other with their backs toward the interior, placed about 5 to 6 feet apart, create a natural ridge for your roof blanket. A sofa back works as a ready-made wall on one side. A coffee table can anchor the opposite end.
If you want more vertical height — say, enough to sit upright inside — position chairs on top of couch cushions, or use bar stools instead of dining chairs. Bar stools give you an interior height of roughly 28 to 30 inches, which is enough to sit cross-legged comfortably without hunching.
Test the stability of your frame before adding any fabric. Push gently on each anchor point. If a chair tips or slides, weight it down with a stack of heavy books on the seat, or move it to rest against a wall.
Step 3: Drape the Roof and Walls
Start with the roof. Take your largest, lightest flat sheet and drape it across the top of your frame structure, making sure it extends past the edges on all sides. A Queen-size flat sheet measures approximately 90 inches by 102 inches — large enough to roof a 5-foot-wide structure with 12 to 15 inches of overhang on each side.
Secure the overhang with binder clips attached to chair backs or rungs. On flat surfaces like a table edge, drape the excess over the side and weigh it down with a stack of hardcover books. The goal is to create tension in the fabric — a taut roof sags less and holds its shape far longer than a loose one.
For walls, use secondary blankets draped vertically from the roof overhang down to the floor. Leave one section open as your entrance — typically about 18 to 24 inches wide, which is enough to crawl through without disturbing the structure. Stack pillows along the base of the walls on the inside to hold the blanket edges down and seal drafts.
Step 4: Build the Pillow Walls and Interior
Pillows serve two functions simultaneously: structural and comfort. Along the interior perimeter, stack pillows two or three high to create insulating walls that also hold the blanket edges in place. Larger, firmer pillows work best here — couch cushions, large square Euro pillows, or standard bed pillows stacked flat.
For the floor interior, prioritize comfort. A folded blanket or sleeping bag makes an adequate base. If you have a foam mattress topper or a camping sleeping pad, lay it down flat — this adds meaningful cushioning and insulates you from the cold floor. Then add your softest pillows on top for the actual sleeping or lounging surface.
This is where a memory foam pillow earns its place. While standard pillows compress quickly under the weight of your head and neck, memory foam maintains consistent support throughout the night. If you are building the fort for a sleepover or an extended movie session, placing a quality memory foam pillow at the head of your interior setup makes the experience genuinely restful rather than just novelty fun.
Step 5: Add Lighting and Final Touches
Attach battery-operated LED string lights to the interior roof using small binder clips or command hooks. Warm white lights (around 2700K color temperature) create a noticeably cozier atmosphere than cool white or daylight LEDs. A 10-foot strand is enough for most forts. Run the battery pack out through a wall gap so you can switch lights on and off without reaching inside.
Add a small tray or flat box just inside the entrance for snacks and drinks. Keep a phone or tablet within reach but face-down when not in use — the screen brightness breaks the cozy atmosphere immediately. If it is winter, a heated blanket rated for indoor use is worth the extension cord.
Why the Right Pillow Changes Everything Inside a Fort
Most people treat pillows as interchangeable when building a fort. In reality, the pillows you use for comfort inside the fort — as opposed to the ones you use for structural wall-building — have a direct impact on how long you can comfortably stay inside.
Standard Pillows vs. Memory Foam Pillows for Fort Use
A standard polyester-fill pillow typically compresses by 30 to 50 percent within the first 20 minutes of use. This means a 6-inch-tall pillow becomes effectively a 3-inch-tall pillow under the weight of your head — which changes your neck alignment, causes discomfort, and leads to the kind of restless shifting that eventually collapses the walls you carefully built.
Memory foam pillows, by contrast, are engineered to respond to body heat and pressure. They compress to conform to the exact contour of your head and neck, then slowly return to their original shape when pressure is removed. Most standard memory foam pillows retain approximately 85 to 95 percent of their original loft even after extended use — a meaningful difference when you are lying down for two to three hours.
Types of Memory Foam Pillows Worth Knowing
Not all memory foam pillows are built the same way. Understanding the main types helps you choose the right one for fort use specifically:
| Type | Construction | Best For | Typical Loft |
|---|---|---|---|
| Solid memory foam | Single contoured block | Back and side sleepers needing consistent support | 4–6 inches |
| Shredded memory foam | Loose fill inside fabric shell | Adjustable loft; stomach and combination sleepers | 3–7 inches (adjustable) |
| Gel-infused memory foam | Foam with cooling gel beads or layer | Anyone who sleeps hot; fort use in warm rooms | 4–6 inches |
| Ventilated memory foam | Foam with punched air channels | Breathability without gel; moderate temperature regulation | 4–5 inches |
For fort use specifically, a shredded memory foam pillow has a practical edge: you can pull out a handful of fill to reduce loft for stomach sleeping, or leave it fully stuffed for side sleeping. This adjustability matters when you do not have perfect control over how you end up positioned inside a fort.
One note on temperature: pillow forts trap body heat effectively. A standard solid memory foam pillow can feel noticeably warm after 30 to 60 minutes in an enclosed space. If you tend to sleep hot or the room is above 70°F, a gel-infused memory foam pillow is worth the small additional cost — most gel-infused options run between $40 and $90, compared to $25 to $60 for basic solid foam.
Common Pillow Fort Designs and Which Situations They Suit
There is no single correct way to build a pillow fort. The best design depends on available furniture, room layout, and how many people will use the space. Here are the most practical configurations:
The Classic Sofa Lean-To
Drape a blanket from the sofa back down to the floor at a 45-degree angle and hold the far edge down with pillow rows. This creates a simple slanted roof with the sofa as a back wall. It is the fastest design to build — roughly 5 to 10 minutes — and uses the fewest materials. The interior space is limited to roughly 3 feet deep by the length of the sofa, which suits one adult or two children. The main weakness is the slanted roof: you cannot sit fully upright near the back wall.
The Four-Chair Cathedral
Position four chairs in a rectangle, backs facing inward, and drape a large flat sheet across the top. This gives you a nearly flat roof and maximum interior height — often 28 to 32 inches depending on chair height. Drape secondary blankets down each side for walls. This design scales easily: space the chairs further apart for more floor space, or add a fifth chair in the middle to prevent roof sag on larger spans. It works well for two adults or a group of children.
The Bed Canopy Fort
Use the bed itself as the floor and drape blankets from a ceiling fan, curtain rod, or tension rod positioned above the bed. Clip the blanket edges to the headboard and footboard. This is the most comfortable design for sleeping since you have the actual mattress beneath you — and it is where having a good memory foam pillow matters most, since you may actually fall asleep. The limitation is that it requires an overhead anchor point, which not all rooms have conveniently located.
The Table Bunker
Drape blankets from a dining table down on all four sides, leaving one side partially open as an entrance. The table acts as the ceiling, which means structural stability is excellent — almost zero risk of collapse. Interior height is limited to the distance between the floor and the underside of the table, typically 27 to 29 inches for a standard dining table. This design suits children better than adults because of the low clearance, but it is genuinely the most structurally stable option available without additional equipment.
Troubleshooting: Why Forts Collapse and How to Fix It
Even well-built forts develop structural problems. Here are the most common failure points and their solutions:
- Roof sagging in the middle: Add a central support — another chair placed in the middle of the span, or stack a tower of firm pillows directly beneath the lowest sag point. For wider spans, a tall laundry basket or a stack of hardcover encyclopedias works surprisingly well.
- Walls collapsing inward: The pillow rows along the base are not heavy or tall enough. Use larger couch cushions instead of standard bed pillows, or double up the rows. The wall pillow stacks need to be at least two pillows high to provide meaningful resistance.
- Blanket slipping off the roof frame: Binder clips are the reliable fix. Clip the blanket directly to the chair back or rung rather than just draping and hoping. On smooth surfaces like a table edge, use a strip of non-slip drawer liner between the blanket and the surface.
- Entrance collapsing when someone crawls in: Frame the entrance specifically — stack firm pillows on each side of the opening vertically, and make sure the roof blanket is clipped or weighted down on either side of the gap. Think of it like a doorframe that needs two solid uprights.
- The whole structure shifting when someone moves inside: The anchor furniture is not heavy enough or is on a slippery floor. Move chairs to rest against walls or heavy furniture. On hardwood or tile floors, place a large area rug under the base of each chair to prevent sliding.
How to Make a Pillow Fort Actually Comfortable for Adults
Children can fall asleep on almost any surface. Adults cannot. If you want a fort that works for a full movie, a long afternoon reading session, or an actual overnight stay, these additions move it from fun to genuinely livable:
Floor Padding is Non-Negotiable
Bare carpet feels fine for the first 20 minutes. After that, you feel every pressure point against the floor. A camping sleeping pad provides about 1.5 to 2 inches of cushioning and folds up easily. A folded mattress topper gives you more comfort but takes up more storage space. Even a doubled-over moving blanket is better than nothing. Layer from the bottom up: floor pad, then a soft blanket, then your pillows.
Use a Memory Foam Pillow for Head and Neck Support
This point cannot be overstated for adult fort use. When you are lying on a firm floor surface, even with padding, your neck needs more precise support than it does on a soft mattress. A mattress compresses slightly to meet the curve of your neck; a firm floor does not. A memory foam pillow compensates for this by contouring precisely to your head and neck shape, filling in the gap that a standard soft pillow would simply compress through.
Side sleepers specifically benefit from a higher-loft memory foam pillow — look for options in the 5 to 6 inch loft range for floor sleeping. Back sleepers do better with medium loft options around 3 to 4 inches. If you are sharing the fort with someone who sleeps differently, a shredded memory foam pillow with adjustable fill solves the problem without needing two different pillows.
Temperature Management Inside the Fort
A blanket-enclosed space traps heat faster than most people expect. A fort built in a 68°F room can feel noticeably warmer inside after 15 to 20 minutes of occupancy. Have a lighter blanket available for covering yourself rather than relying on the fort walls for warmth — you need the wall blankets to stay in place, so you should not be pulling them around you.
Leave a small ventilation gap at the entrance or along one wall. A 3 to 4 inch gap at the base of a wall blanket is invisible from inside but meaningfully improves air circulation without compromising the enclosed feeling.
Organize the Interior Before You Settle In
Once you are inside a fort, reaching back out to grab things disturbs the structure constantly. Before sealing yourself in, bring everything you need: water bottle, phone charger, snacks, remote, book, and anything else. Arrange them in one corner of the fort so you know exactly where to reach without moving. Use a small tray to keep everything organized and off the floor surface you are lying on.
Building a Fort With Kids: Practical Adaptations
Pillow forts with children involve different priorities than adult solo builds. The goal shifts from personal comfort to involving the child in the building process while keeping the structure safe.
- Let them make decisions: Ask the child where the entrance should go, what color blanket to use for the roof, and how many pillows they want inside. Ownership of the design significantly increases how much they enjoy the result.
- Size it for them: A fort sized for adults feels enormous and impersonal to a young child. A snug, appropriately-sized space — roughly 3 feet wide by 4 feet long — feels genuinely like a secret hideout rather than a tent.
- Check for pinch and topple hazards: Make sure no heavy furniture can tip if a child pushes against a wall from inside. Avoid using chairs positioned directly above the interior space — if a chair topples inward, it falls onto whoever is inside.
- Use softer pillows inside for children: Standard couch cushions are ideal for wall building with kids — they are firm enough to stack but soft enough that a toppling wall does no harm. Avoid heavy Euro pillows stacked three high in a child's fort.
- Build in natural light control: Use a light-colored sheet for the roof rather than a dark blanket. It allows more ambient light inside, which children generally prefer, while still creating the enclosed, cozy atmosphere that makes forts appealing.
For children who plan to actually nap or sleep in the fort, using a softer memory foam pillow designed for children — typically with a lower loft of 2.5 to 3.5 inches — is worth considering over standard adult pillows, which position a child's head too high and create the same neck alignment problems that adult pillows cause for children in regular beds.
Advanced Fort Building: Techniques That Make a Real Difference
Once you have built a few basic forts, these intermediate techniques produce noticeably better results:
The Tension Line Roof Method
Instead of draping a blanket loosely across furniture, run a length of cord or rope between two anchor points first — say, between two doorknobs or two pieces of furniture on opposite sides of the room. Then drape the blanket over the cord. The cord creates a ridge line that prevents roof sag entirely, similar to how a tent is constructed. A 10-foot length of paracord handles most room-sized forts and stores compactly.
Multi-Room Fort Networks
Connect multiple fort chambers with tunnel sections. Build each chamber separately, then create a connecting passage by draping a blanket between the entrances of two adjacent forts and holding the sides up with stacked pillows. The tunnel section only needs to be about 18 inches wide and 18 inches tall — just enough to crawl through. This design is particularly appealing to children and requires surprisingly few additional materials beyond what each fort would need independently.
Using Command Strips for Ceiling Anchors
3M Command hooks rated for 3 to 5 pounds can be temporarily attached to a painted wall or ceiling without leaving marks, provided you remove them according to the package instructions. Attaching a hook to the ceiling directly above the fort's center point lets you run a blanket up to the ceiling as a tent-style peak, dramatically increasing interior height and giving the structure a more defined, stable shape. Remove the hook within 24 to 48 hours to avoid any potential adhesive residue on painted surfaces.
Layered Roof for Better Insulation and Darkness
Use two blanket layers on the roof — a lighter flat sheet on the bottom for aesthetics and LED light diffusion, and a heavier or darker blanket draped over the top for insulation and to block exterior light. The gap between the two layers traps air, which meaningfully improves warmth retention inside. This technique is especially effective in winter months or in rooms with overhead lighting that would otherwise bleed through a single thin sheet.
Frequently Asked Questions About Building Pillow Forts
How long does a well-built pillow fort last?
A fort built with proper clips and anchor furniture can hold its structure for 8 to 24 hours without major adjustments, assuming no one is actively climbing on it or repeatedly entering and exiting. The main deterioration factors are ceiling sag (addressed with a central support) and wall pillow stacks shifting over time (addressed by double-row or heavier pillows).
Can you sleep in a pillow fort overnight?
Yes, with the right setup. The critical requirements are: adequate floor padding, a quality head pillow (a memory foam pillow is the best option for this), sufficient ventilation to prevent overheating, and a stable enough structure that you will not wake up with a blanket collapsed on your face at 2 AM. Adults find floor sleeping more manageable on a yoga mat or sleeping pad than directly on carpet.
How many pillows do you actually need?
For a single-person fort: a minimum of 8 standard bed pillows — approximately 6 for wall building and 2 for comfort inside. For a two-person fort: plan on 14 to 18 pillows. Larger group forts or multi-room designs can realistically use 25 or more. You almost always need more than your initial estimate.
What is the best pillow to use inside a fort for sleeping?
For actual sleeping rather than just lounging, a shredded memory foam pillow with adjustable fill is the most versatile option. It adapts to different sleeping positions, maintains consistent support throughout the night, and does not compress flat the way polyester-fill pillows do. If temperature retention is a concern in your fort setup, a gel-infused memory foam pillow runs cooler while providing the same support characteristics.