English
 عربى
عربى
Content
- 1 The Direct Answer: Hand Wash Only, Never Machine Wash
- 2 Why Foam Pillows Require a Different Cleaning Approach
- 3 What You Need Before You Start Cleaning
- 4 Step-by-Step: How to Hand Wash a Foam Pillow
- 5 Spot Cleaning: The Right Way to Handle Stains on a Foam Pillow
- 6 How Often Should You Clean a Foam Pillow
- 7 Drying a Foam Pillow Properly — The Step Most People Get Wrong
- 8 Cleaning Different Types of Foam Pillows
- 9 Common Cleaning Mistakes That Damage Foam Pillows
- 10 How to Remove Specific Stains from a Memory Foam Pillow
- 11 Protecting a Foam Pillow to Reduce How Often It Needs Cleaning
- 12 When to Stop Cleaning and Replace the Foam Pillow Instead
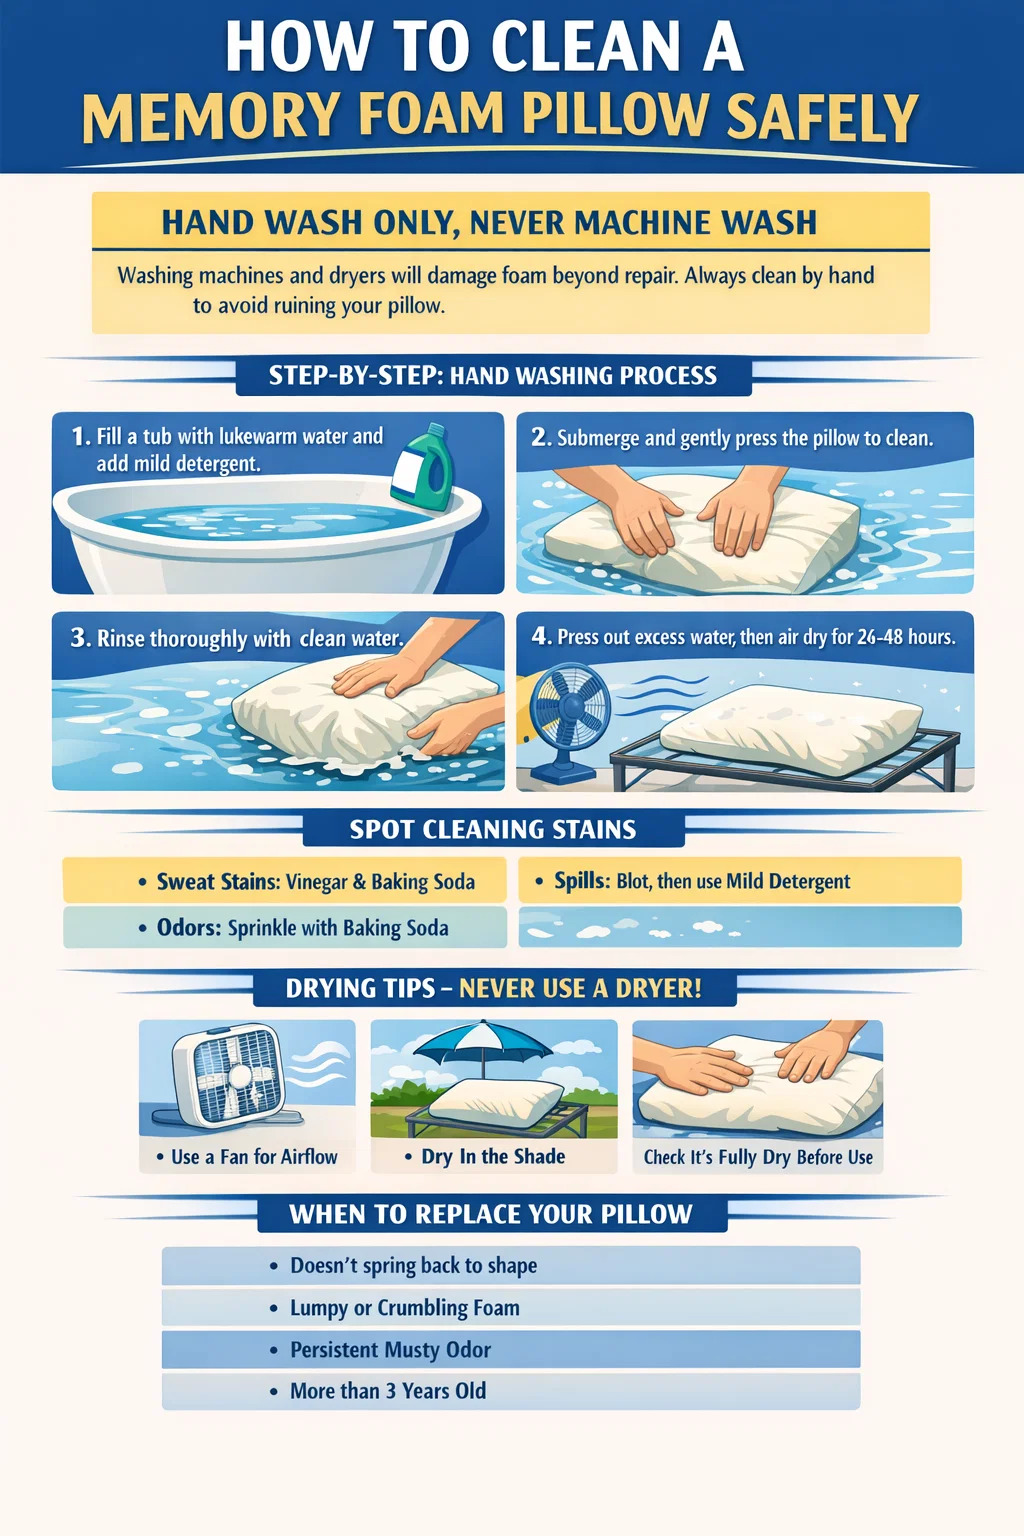
The Direct Answer: Hand Wash Only, Never Machine Wash
The single most important rule when cleaning a foam pillow — especially a memory foam pillow — is this: never put it in a washing machine or dryer. The agitation cycle tears the foam's open-cell structure apart, and the heat from a dryer breaks down the viscoelastic compounds that give memory foam its pressure-relieving properties. A memory foam pillow that goes through even one machine wash cycle will never recover its original support shape.
The correct method is hand washing with lukewarm water and a small amount of mild liquid detergent, followed by a long air-dry period — typically 24 to 48 hours. For spot cleaning between full washes, a mixture of water and white vinegar applied with a cloth works effectively on most stains without saturating the foam. This guide covers every scenario in detail, from routine freshening to deep cleaning a heavily soiled memory foam pillow.
Why Foam Pillows Require a Different Cleaning Approach
Understanding the material helps explain why foam pillows — particularly memory foam pillows — demand more careful handling than standard polyester or down pillows. Memory foam is made from polyurethane with added chemicals that increase its viscosity and elasticity. This structure consists of millions of interconnected open cells that trap air and slowly release it under pressure, which is what creates the contouring effect.
These open cells also absorb water readily. When a foam pillow becomes saturated — as it would in a washing machine — the water trapped inside can take days to fully evaporate. If the interior remains damp for more than 24–36 hours, mold and mildew can establish inside the foam where you can't see or smell it immediately. By the time the odor becomes noticeable, the contamination is already deep within the foam structure and nearly impossible to fully eliminate.
Additionally, foam has no tensile strength. Unlike fabric or fiberfill, foam cannot withstand the mechanical forces of a spin cycle. The material tears along the cell walls, creating permanent structural damage that shows up as crumbling, irregular softness, or lumping. This is why the cleaning approach for foam pillows focuses on minimal water exposure and zero mechanical agitation.
What You Need Before You Start Cleaning
Gathering the right supplies before you begin prevents mid-process issues. Using the wrong detergent or tools can cause as much damage as improper washing technique.
- Mild liquid detergent: Choose a detergent free of enzymes, bleach, and optical brighteners. Baby laundry detergent or a gentle dish soap like diluted castile soap works well. Enzyme-based detergents can degrade polyurethane foam over time with repeated use.
- White vinegar: Effective for deodorizing and mild stain removal. A 1:1 ratio with water creates a reliable spot-cleaning solution that doesn't leave residue.
- Baking soda: Invaluable for dry deodorizing and absorbing surface moisture. It can be applied directly to the foam surface without water.
- Clean white cloths or sponges: Avoid colored cloths that might transfer dye to damp foam. Use separate cloths for applying cleaner and for blotting dry.
- A bathtub or large basin: For full washes, you need enough space to submerge the pillow and gently squeeze water through it without folding or twisting.
- Dry towels: For pressing excess water out of the foam after washing before the air-dry phase begins.
- A well-ventilated space: Direct airflow — ideally outdoors in indirect sunlight or near an open window with a fan — is essential for adequate drying.
Step-by-Step: How to Hand Wash a Foam Pillow
This method works for memory foam pillows, latex foam pillows, and shredded foam pillow inserts. The process takes about 20 minutes of active time, but the total commitment includes a 24–48 hour drying window.
- Remove the pillowcase and cover. Always wash the cover separately according to its own care label. Most memory foam pillow covers are machine washable. Set the foam insert aside.
- Fill the bathtub with lukewarm water. Hot water can alter the foam's density and accelerate breakdown of the foam's chemical structure. Aim for water that feels neutral on the inside of your wrist — not warm, not cool.
- Add a small amount of mild detergent. Approximately 1 tablespoon per standard pillow is sufficient. Swirl the water to distribute evenly before adding the pillow. Adding too much detergent creates a rinsing problem — excess soap is extremely difficult to fully remove from foam without over-saturating it.
- Submerge the foam pillow and gently compress. Press the pillow down repeatedly using both palms in a pumping motion. Do not twist, wring, or fold. The goal is to push soapy water through the foam cells and then allow it to re-expand. Continue for 3–5 minutes.
- Drain the soapy water and refill with clean water. Repeat the compression process to rinse the soap out. You will likely need to do this 2–3 times until the water running out of the foam when compressed is completely clear and free of suds.
- Remove excess water by pressing — not wringing. Lift the pillow out of the tub and place it on a stack of dry towels. Press firmly on the top surface with flat palms. Fold a towel over and press again. Repeat with fresh dry towels until you can no longer extract visible water this way.
- Air dry completely before use. Place the pillow flat on a clean dry surface in a well-ventilated area. Flip it every 4–6 hours to ensure even drying. Do not use the pillow until it is completely dry throughout — press your fingers into the center to check for residual dampness. This typically takes 24–48 hours depending on humidity and airflow.
Spot Cleaning: The Right Way to Handle Stains on a Foam Pillow
For isolated stains — sweat marks, saliva, minor spills — spot cleaning is always preferable to a full wash. It limits moisture exposure and can be completed and dried within a few hours rather than days.
For Yellow Sweat Stains
Yellow discoloration on foam pillows is caused by a combination of sweat, body oils, and oxidation. Mix 1 part white vinegar with 1 part water in a spray bottle. Lightly mist the stained area — do not soak. Work a small amount of baking soda into the damp area with your fingers, which will create a mild fizzing reaction that helps lift the stain. After 15 minutes, blot the area with a clean damp cloth, then press dry with a towel. Allow to air dry fully before replacing the cover.
For Fresh Liquid Spills
Act immediately. Blot — never rub — the area with a clean dry cloth to absorb as much liquid as possible before it penetrates deeper into the foam. Once you've absorbed the surface liquid, apply a small amount of diluted mild detergent with a damp cloth, blotting from the outside of the stain inward to prevent spreading. Rinse by blotting with a clean water-dampened cloth, then press dry with a towel.
For Odor Without Visible Staining
Remove the pillow cover and sprinkle a generous layer of baking soda over the entire exposed foam surface. Let it sit for at least 2 hours — overnight is more effective. The baking soda absorbs odor compounds rather than masking them. Vacuum the baking soda off using the upholstery attachment on low suction. Flip and repeat on the other side. This dry method can be done monthly without any risk to the foam's structure.
How Often Should You Clean a Foam Pillow
Cleaning frequency depends on how the pillow is used and protected. A memory foam pillow used with a quality waterproof cover can go much longer between full washes than one used with just a standard cotton pillowcase.
| Task | Frequency | Method |
|---|---|---|
| Pillowcase wash | Weekly | Machine wash per label |
| Baking soda deodorize | Monthly | Dry application, vacuum off |
| Spot clean stains | As needed | Vinegar/water or mild detergent |
| Full hand wash (with cover) | Every 6 months | Bathtub, gentle compression |
| Full hand wash (no cover) | Every 3–4 months | Bathtub, gentle compression |
| Air out in indirect sunlight | Monthly | 2–3 hours outside, no direct sun |
Note that airing out a memory foam pillow in indirect sunlight is one of the most underused maintenance steps. UV exposure has mild antimicrobial effects, and the airflow helps release accumulated moisture from nightly use. Direct sunlight, however, degrades polyurethane foam — the UV exposure that helps with bacteria also causes the foam's cell structure to become brittle over time. Keep it in a shaded area with good air circulation.
Drying a Foam Pillow Properly — The Step Most People Get Wrong
Improper drying is responsible for the majority of foam pillow damage and mold problems. It's also the step most people rush or handle incorrectly. The following covers the most critical aspects of getting drying right.
Never Use a Dryer — Even on Low Heat
Even a dryer set to the lowest heat or air-dry setting poses a significant risk. The tumbling action subjects foam to repeated compression and extension cycles that tear the cell walls. At temperatures above 130°F — which many "air dry" settings still reach — the polyurethane begins to soften permanently, causing the foam to lose its shape memory. Some people report that their foam pillow survived one or two dryer cycles, but the internal damage accumulates and the pillow's effective lifespan shortens dramatically.
Accelerating Drying Safely
If you need to speed up drying — for example, during humid weather — these methods are safe to use:
- Box fan positioned directly at the pillow: Place the pillow on a clean drying rack and aim a fan at it on high. Rotate the pillow every 2–3 hours. This can reduce drying time from 48 hours to approximately 18–24 hours.
- Dehumidifier in the room: Running a dehumidifier in the drying area lowers ambient moisture, which dramatically improves evaporation rate from the foam's surface.
- Outdoor air drying in shade: If weather conditions allow, outdoor drying with good airflow is the most effective method. Keep the pillow out of direct sunlight and bring it inside before evening dew sets in.
- Hair dryer on cool setting only: Can be used to help dry a specific spot after spot cleaning. Hold at least 8–10 inches away from the foam surface and keep it moving — never concentrate heat in one spot.
How to Confirm the Pillow Is Fully Dry
The outside of a foam pillow can feel dry while the interior remains damp — which is the condition that leads to interior mold growth. To test: press both hands firmly into the center of the pillow and hold for 5 seconds. Release and check your palms for any moisture transfer. Alternatively, fold the pillow slightly (not sharply) and press into the fold area — if any coolness or clamminess is felt, drying is not complete. A fully dry foam pillow should feel uniformly room temperature throughout with no moisture transfer at all.
Cleaning Different Types of Foam Pillows
While the general principles apply broadly, specific foam types have nuances worth knowing.
Solid Memory Foam Pillows
These are the most common type and the most sensitive to over-wetting. Because they are a single dense block, water takes the longest to penetrate and then exit. The hand wash method described above is the standard approach. Prioritize the least water exposure possible while still achieving cleaning — if spot cleaning can address the issue, it always should. A solid memory foam pillow that gets fully saturated may take 3–4 days to dry completely in average indoor conditions.
Shredded Memory Foam Pillows
Shredded memory foam fills are made of small, irregularly shaped pieces of foam rather than one solid block. The fill can sometimes be machine washed on a gentle cycle in a mesh laundry bag, but only if the manufacturer explicitly confirms this on the care label. The individual shreds are less vulnerable to agitation damage than a solid block. However, drying remains the challenge — shredded foam clumps together when wet and must be manually separated and fluffed every 2–3 hours during drying to prevent inner areas from remaining damp.
Latex Foam Pillows
Natural latex foam shares many cleaning restrictions with memory foam but is somewhat more resilient to water. It still cannot go in a washing machine or dryer. Latex can tolerate cooler water washing slightly better than polyurethane memory foam, but it is heavier when wet and can be difficult to handle in a bathtub. Spot cleaning is particularly important to prioritize for latex pillows. One difference from memory foam: latex is naturally antimicrobial, so odor concerns are generally less pressing than with polyurethane foam.
Gel-Infused Memory Foam Pillows
Gel-infused foam has the same care requirements as standard memory foam. The gel microbeads or gel layer are integrated into the foam structure and are not affected by gentle hand washing. Avoid using any harsh chemicals or enzymatic cleaners on gel-infused foam, as these can cause the gel pockets to degrade more quickly than the surrounding foam, resulting in uneven texture.
Common Cleaning Mistakes That Damage Foam Pillows
These errors come up repeatedly and account for the premature breakdown of most foam pillows that are "cleaned to death."
| Mistake | What Actually Happens | Correct Alternative |
|---|---|---|
| Machine washing | Foam tears along cell walls, permanent structural damage | Hand wash in bathtub, gentle compression |
| Using a dryer | Heat softens polyurethane, foam loses shape memory | Air dry with fan, 24–48 hours |
| Wringing or twisting | Tears foam internally even if no visible damage appears | Press with flat palms on towels |
| Using bleach or harsh cleaners | Chemically degrades polyurethane, causes crumbling | Mild detergent or white vinegar only |
| Using before fully dry | Interior mold and mildew develop inside foam | Check center with palm press test before use |
| Leaving in direct sunlight | UV causes foam brittleness and yellowing over time | Dry in shade with good airflow |
| Rubbing stains | Pushes stain deeper into foam cells, spreads damage | Blot only, working from outside inward |
How to Remove Specific Stains from a Memory Foam Pillow
Different stains respond to different treatments. Using the wrong approach can set the stain or drive it deeper into the foam.
Blood Stains
Use cold water only — never warm or hot, which will set the protein in the blood and make the stain permanent. Mix a small amount of hydrogen peroxide (3% concentration, standard pharmacy grade) with cold water at a 1:3 ratio. Dab onto the stain with a cloth and let sit for 5 minutes. Blot with a clean cold-water-dampened cloth. Do not use hydrogen peroxide at full strength on memory foam as it can cause surface discoloration.
Urine Stains
Act immediately to blot up as much liquid as possible. Apply a mixture of 1 cup white vinegar, 1 cup water, and 2 teaspoons baking soda to the affected area. The vinegar neutralizes the uric acid compounds responsible for the persistent odor. Let sit for 10–15 minutes, then blot thoroughly with a clean damp cloth. Sprinkle dry baking soda over the area and allow to sit for 8 hours or overnight before vacuuming off. For old, dried urine stains, this process may need to be repeated 2–3 times.
Mold or Mildew Spots
Surface mold — appearing as small dark or greenish spots — can sometimes be treated, but interior mold contamination typically means the pillow needs to be replaced. For surface mold, take the pillow outdoors first to avoid spreading spores indoors. Apply a mixture of equal parts rubbing alcohol and water to the affected area. Let sit for 10 minutes, blot thoroughly, and allow to dry completely outdoors in a shaded area. If the mold smell persists after drying, or if spots return within a few days, the foam has internal mold contamination and should be discarded. No amount of cleaning can eliminate deep foam mold safely.
Oil and Grease Stains
Body oil stains — one of the most common types on pillows — respond well to a paste made from baking soda and a small amount of dish soap. Apply the paste to the stain and work it in gently with your fingertips. Let sit for 20–30 minutes, then blot away with a damp cloth. Dish soap is specifically formulated to cut through grease and works more effectively on oil stains than general laundry detergent. Rinse the area with a water-dampened cloth and press dry with a towel.
Protecting a Foam Pillow to Reduce How Often It Needs Cleaning
The best cleaning strategy is reducing how much cleaning is needed. A few protective measures can dramatically extend the intervals between washes and keep a foam pillow in good condition for its full expected lifespan of 2–3 years.
Use a Waterproof Pillow Protector
A waterproof pillow protector sits between the foam insert and the pillowcase, blocking sweat, oils, saliva, and spills from reaching the foam at all. Look for protectors made from breathable waterproof materials like Tencel with a waterproof backing — these block liquids without creating the hot, plasticky feel of older vinyl protectors. With a quality waterproof protector in place, the foam insert itself may only need cleaning once or twice a year rather than every few months.
Wash the Pillowcase Weekly
A human scalp produces approximately 1–2 grams of sebum (skin oil) per day. Over a week of nightly use, a significant amount of oil, dead skin cells, and sweat accumulates on a pillowcase. Washing pillowcases weekly — and the protector every 2–4 weeks — prevents this buildup from migrating through to the foam insert underneath. This single habit has a disproportionate impact on how clean the foam itself stays over time.
Air Out the Pillow Regularly
Once a month, strip the pillow of its cover and let it breathe in a ventilated area for 2–3 hours. This releases accumulated moisture from nightly use, which — if left unchecked — creates the humid interior environment that encourages bacterial and mold growth over time. This takes no effort and costs nothing, but it meaningfully extends the usable life of the foam and keeps it smelling fresh between washes.
When to Stop Cleaning and Replace the Foam Pillow Instead
Cleaning can maintain a foam pillow, but it cannot reverse structural deterioration. Knowing when a foam pillow has reached the end of its useful life saves both effort and the discomfort of sleeping on a pillow that's no longer providing adequate cervical support.
Replace your memory foam pillow when you notice any of the following:
- The foam no longer springs back to its original shape within 5 seconds of being compressed — or doesn't return to shape at all.
- Visible crumbling, cracking, or uneven lumps within the foam when you press into it.
- A persistent musty or sour odor that remains even after thorough cleaning and drying — this indicates embedded mold or bacterial contamination.
- You wake up with consistently more neck stiffness than you did 6–12 months ago, despite no change in sleep habits.
- The pillow is more than 3 years old and has been in regular nightly use — even well-maintained foam degrades chemically over time regardless of how little physical wear it shows.
Memory foam pillows are an investment in sleep quality and cervical health, but they are not indefinitely reusable. Extending a foam pillow well past its functional lifespan through excessive cleaning actually accelerates its breakdown while delivering diminishing returns on support. A replacement foam pillow at the right time is more cost-effective than continued maintenance of one that has stopped working properly.